Hardware Measurement
Use hardware mode when you want MatchPatch to measure your real Line 6 Helix or Pod Go.
Hardware mode gives the results you should use for rehearsal, stage preparation, and final setlist balancing.
Before You Start
Connect the processor by USB.
Make sure the processor is powered on.
Make sure your computer can see the processor audio device.
Make sure your computer can see the processor MIDI output.
Have a reference DI WAV ready.
Back up your original
.hls,.hlx,.pgs, or.pgpfile.Run preflight check from Advanced > Diagnostics before your first hardware measurement.
See also:
What Hardware Mode Does
MatchPatch sends the reference DI to the processor, switches presets and snapshots, records the processed sound, and measures the loudness.
The processor is doing the real tone work. MatchPatch is listening and calculating the output-level changes.
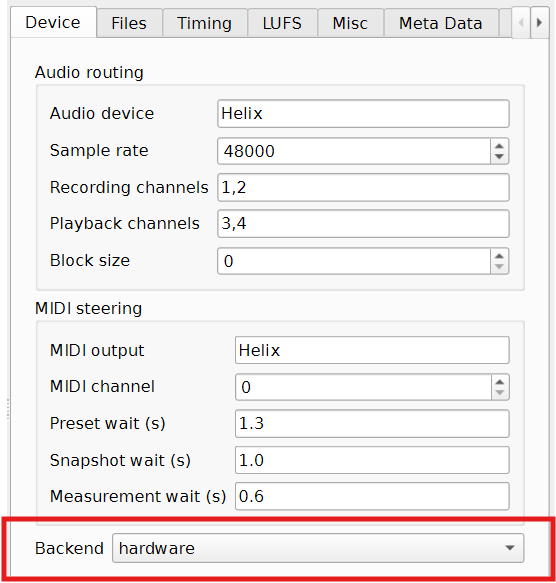
Check The Backend
Open Advanced.
Go to the Device tab.
Set Backend to
hardware.
Run Preflight First
Before the first real measurement, open Advanced > Diagnostics and click Run preflight check. The check validates the file selection, preset selection, reference DI, resolved settings, and hardware setup before MatchPatch starts recording.
In hardware mode, the hardware checks validate the selected audio device, recording and playback channels, MIDI output, MIDI channel, and timing values used by the native Windows worker.
If Preflight reports a failure, fix that item before starting normalization. If you need help, use Export diagnostic bundle from the same tab and include the bundle in a bug report.
Check Audio Routing
In the selected device settings, check:
Audio device.
Recording channels.
Playback channels.
Sample rate.
Block size.
For many Helix and Pod Go setups:
processed audio returns on USB
1/2;the reference DI is sent to processor USB
3/4.
Your own system may differ.
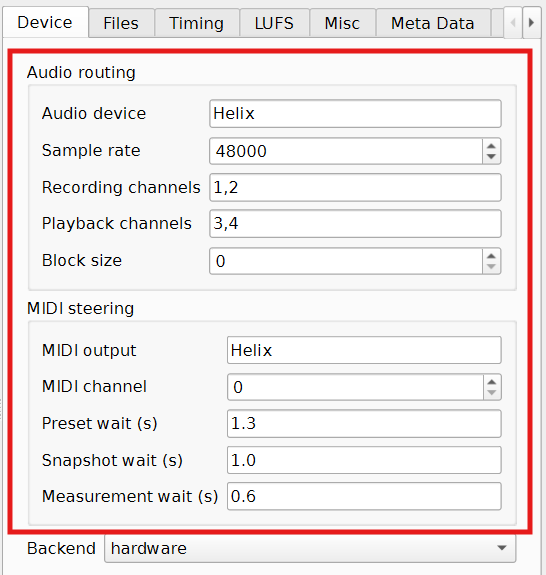
Check MIDI Steering
In the selected device settings, check:
MIDI output.
MIDI channel.
Preset wait.
Snapshot wait.
Measurement wait.
MIDI steering is how MatchPatch changes presets and snapshots during the run.
Run The Hardware Check
When you start a hardware run, MatchPatch checks whether the backend is available.
If the check succeeds, measurement continues.
If the check fails, MatchPatch shows an error. Check USB connection, audio device name, MIDI output name, and whether the processor is powered on. The error uses the same structured hardware checks that Preflight and diagnostic bundles save for troubleshooting.
Use Recorded-Output Playback
The toolbar can record measured output and play it back.
Use this to confirm MatchPatch actually recorded the processed signal. If you hear silence or the wrong sound, check routing before trusting the results.
What Success Looks Like
Hardware check passes.
Presets switch on the processor during measurement.
Snapshot changes happen during measurement.
The loudness bar updates.
Recorded-output playback sounds like the processed tone.
The result table does not show unexpected red warnings.
If Something Goes Wrong
If hardware is not found, check USB, audio device, and MIDI output.
If recorded-output playback is silent, check routing.
If rows are red, use Default timing and check Troubleshooting.
If measurements vary, read Measurement Timing.
Warning: Wrong USB channels can record silence. Silence often causes bad LUFS or implausible output-gain warnings.
Warning: Use slower timing for presets with long delay or reverb trails. Fast timing can make one snapshot bleed into the next measurement.